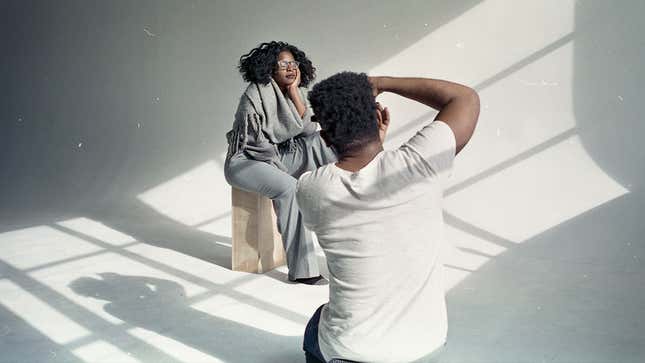
Editor’s Note: This story was produced by Consumer Reports, an independent, nonprofit member organization that works to create a fair and just marketplace. Sign up for CR’s free newsletters.
In a recent conversation on Facebook, a friend of mine, who is white, noted that he did not see his racial identity as part of himself when growing up. His parents were careful to encourage a “colorblind” point of view. I’ve heard this often—the phrase “I don’t see color” is articulated as a source of pride. It wasn’t until I read my friend’s message that I was taken aback by my own self-reflection: I don’t remember a time where I wasn’t hyper-aware of my Blackness. The experience of being colorblind in the context of race is a privilege and one that I can likely never know. My Blackness is omnipresent. It is with me while casually browsing in a store, while navigating the New York City dating scene (a rollercoaster we do not have time to go on here), or reading a classic novel.
Paradoxically, though omnipresent, my Blackness can still feel undervalued, with its particularities not fully seen—even to myself. The desire to understand that paradox is part of what led me to pick up a second-hand digital camera in my early teens. With it, I began to ask: Where did my identity fit among the spectrum of human experiences? Where was my hue among the rainbow that tethers the Black Diaspora together? And once discovered, how can I use the camera to honor them both?
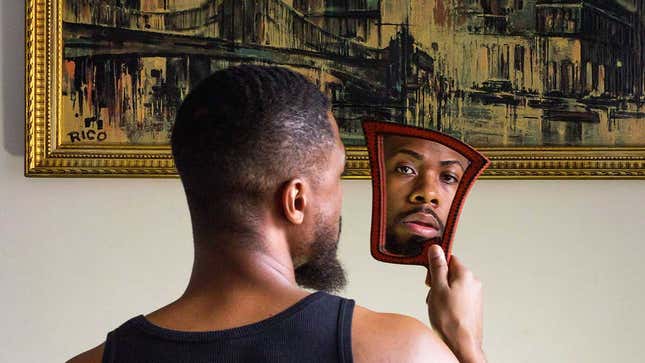
Any camera, from a smartphone to an SLR, can be a powerful tool of internal and external exploration. Whether taking a selfie or photographing a friend, they present all of us with the possibility of illuminating a story that affirms and articulates. Yet who is telling that story, what story they’re telling, and how they’re telling it has a complex and sometimes painful history, especially for people of color. Portrayals that may be considered stereotypical, racist, or unflattering mar visual references that I and other people of color can cull from. This topic gained renewed attention recently with the August 2020 cover of Vogue featuring Olympic gymnast Simone Biles, photographed by Annie Leibovitz. Commenters on social media expressed disappointment with the ways the photographs for the issue were lit and edited. (I participated in that discussion myself by sharing how I may have approached editing the cover.) In 2002, another Vogue cover featuring basketball player LeBron James, again by Leibovitz, was criticized by some for its apparent reference to the fictional character King Kong. And in 2018, National Geographic publicly acknowledged the racist ways it depicted people of color throughout its history.
Luckily, the past can teach and inspire greater levels of thoughtfulness and intention when photographing individuals of color in the present—opening our eyes to not just better represent various skin tones, but to respect and celebrate them. To that end, I spoke with three Black, professional photographers with expertise in portraiture to gather tips and techniques anyone can use to strengthen their creative muscles behind the camera, especially when photographing portraits of individuals of color.
Before You Photograph, Listen With Intention
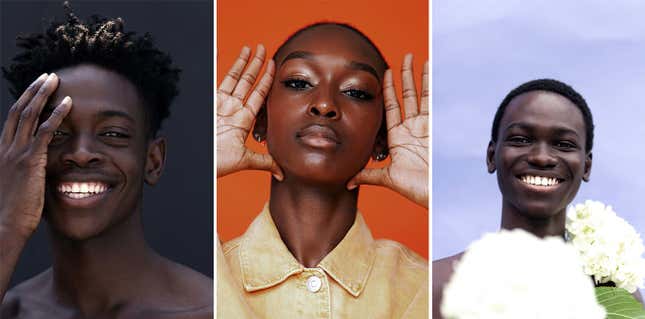
Do you know that feeling when someone is genuinely, deeply listening to you? Such active listening is helpful when photographing anyone, no matter what race or ethnicity, because it can make space for authentic captures that reflect your subject’s uniqueness. For the photographs above, portrait photographer Delwin Kamara invited this kind of authenticity from his models. “It’s just letting them know that they can just be themselves and they can play around, and they can be expressive,” he shares. Portrait photography is, in a sense, a dialog between photographer and subject. As with any good conversation, sometimes you can learn a lot more if you listen before speaking. “I will give instructions but I’m really taking their lead. Whatever they feel is right I’m going to capture it,” says Kamara, whose work has appeared in Interview and Wonderland Magazine.
Unfortunately, “for too long,” notes portrait photographer Aundre Larrow, whose work has appeared in The New York Times, People magazine, and others, “people haven’t been listening to people of color.” The end results in the realm of photography can be tone-deaf, inaccurate, and disparaging images that prioritize a photographer’s opinion of a person over who that person may actually be.
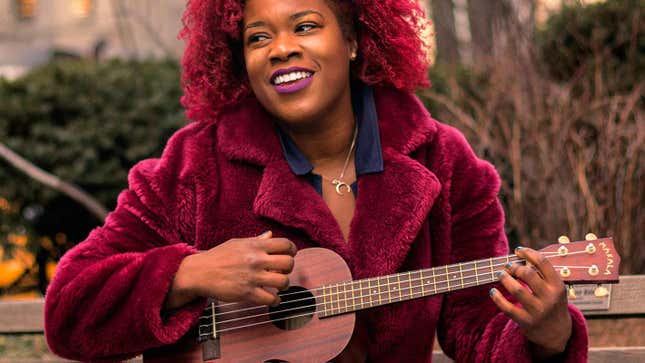
For thoughtful, evocative portraits, first get to know your subjects if you can. How are they feeling? What are they insecure about? What can you gather about their personality? Digging deep, even for a few moments, can reveal unique subtleties that may subvert internal bias. It can expand creative possibilities, too, helping to inspire the props, location, and styling that will bring your portrait to life. My friend Carami, for instance, is an opera singer and ukulele player (an awesome combination, right?!). When capturing photos of her earlier this year, we aimed to ensure those unique qualities took center stage.

Not doing a planned photoshoot? If there isn’t an opportunity for one-on-one dialogue, respectfully observing the subtleties of your subjects can lend itself well to evocative, multilayered captures. This unobtrusive style of listening, where the photographer follows the movements of their subject while providing minimal direct input, is a primary focus of photographer Noemie Tshinanga, who has worked with brands like Spotify, Refinery29, and Fast Company. Whether photographing celebrities, people in the neighborhood, or friends at an event like the photograph above, close observation “introduces the narrative of the nuances in our life and our lifestyle,” she shares. From styling one’s hair to simply laughing with friends, a powerful story can be told in everyday activities. “We as Black people, our existence and what we do is interesting and fascinating and dope enough to be captured.”
While You Photograph, Experiment With Light
Complementing the uniqueness of your subject are the nuances of light and shadow, which will dance differently across varied skin tones and hair colors. When shooting, Larrow suggests walking around your subject and seeing how the light hits them at different points on their face. This may reveal particularly beautiful angles worth capturing, as well as areas where the light may be too bright or where details like the textures in hair are lost. Another technique he notes, which he attributes to professional photographer Ray Spear, is to stick out your hand and rotate it in the light (this works especially well in natural light) while paying attention to where the light is most reflective (i.e. the highlights). “That’s the kind of detail that you want.”
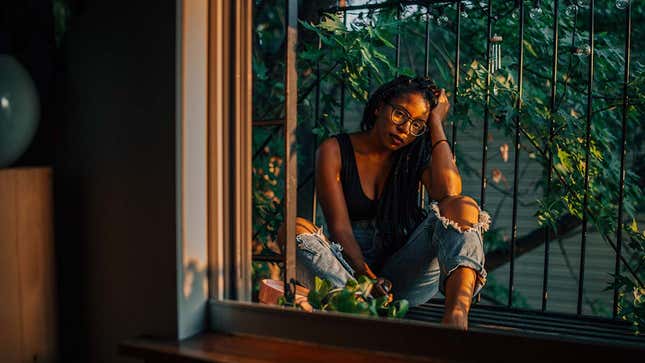
Whether you’re using light from the sun or from an artificial light source like a lamp, Tshinanga encourages placing the light in front of your subject, not behind, for optimal portraiture. “Lighting is your best friend,” Tshinanga notes. When shooting outside, though, consider times of day where the sun is most flattering for a variety of skin tones. That’s typically early in the morning or when the sun is setting, says Kamara. Tshinanga’s self-portrait above, for instance, was taken at dusk. Apps such as Magic Hour and PhotoPills can help you determine exactly what times of day in your area align with that recommendation.
Conversely, extreme sunlight, which causes deep shadows, can be most prominent in the middle of the afternoon and not as flattering for portraits. If you’re photographing at an event like a graduation or baby shower during that time of day, Larrow uses a shaded area like an awning or garage to photograph. “Everything behind them has the light of the garage, which is less than the light of outside,” he notes. This keeps extremes of deep shadows and super-bright highlights to a minimum.
Still, for individuals with features like dark, textured hair, this technique may introduce a diminishment of detail, particularly if you’re aiming to photograph the subject directly facing the camera. In response, try adjusting the visual story: Larrow suggests turning your subject at an angle. Pay attention to where the light begins to illuminate aspects of the hair and face that you can then capture in your frame. To introduce more light into broader shadow areas, the more ambitious photographer may want to consider having a bounce card on hand, which can be as simple as a white poster board. This will bounce light from one light source and introduce more of it in darker areas.
While photographing, remember to move yourself, and encourage the person you’re photographing to move around, too. Experiment with a variety of angles and poses to see how the dynamism of light works across your subject and their hue. Try establishing visual interest with poses that are off-center within the photo frame, and compose thoughtfully, thinking of how the person’s story can inform your photo-taking experience. “Make sure everything in the frame makes sense,” says Kamara. In addition to light, capturing a wide range of poses and moods to curate from later is one of the best strategies for a successful creative outcome—and a low-cost one in the age of digital photography.
One note about digital filters: Modern smartphones and digital cameras often have a variety of in-camera digital effects and filters that allow you to change the look of photos that you take. Apple iPhones, for instance, have filters such as Vivid and Dramatic Warm, while Samsung Galaxy phones’ My Filters feature allows you to create filters from existing photos. For greater accuracy in representation, consider shooting without them. These filters can alter your subject’s skin tone and may be difficult to correct when editing later. Plus, you can always add filters later if artistic inclinations and your subject’s story call for them.
After You Photograph, Edit With Details in Mind
Photo selection and editing can be just as important as the original shot. Indeed, the click of your camera or tap on your phone to capture the perfect pose is just one part of the photographic experience.
After shooting, take stock of what you shot. Do the images connect to the original intent and your subject’s story? Is there a single image or are there a few that are particularly poignant? Much of the impact in a great portrait can be in the details, but sometimes those may not be as visible as desired. Are you missing any of those critical details in your subject’s hair and face?
Desktop and mobile apps specifically for photo editing can help retrieve some missing details. They vary in cost, but many of them, like Instagram, Microsoft Photo Editor, and GIMP are free and offer the ability to crop, rotate, and adjust the brightness, saturation, and hues within your image. VSCO is another editing tool that offers a robust selection of free editing options, in addition to a paid membership that, for $19.99 a year, includes add-ons like educational content. The Creative Cloud Photography plan from Adobe starts at $9.99 per month and includes Photoshop and Photoshop Lightroom, both of which are popular among dedicated photographers for their wide range of granular editing options.
If you can, I recommend photographing in a RAW file format if you’re using a digital camera, instead of the common JPG or PNG formats. RAW files give you the highest quality capture of an image, which offers greater editing flexibility than other file formats. However, this file format does require significant space on your camera’s memory card, which may mean spending extra for more or larger cards. It also may mean using a file converter before you’re able to edit your image, depending on which editing app you choose.
As a beginning step in editing, Larrow suggests looking for the tool that adjusts contrast in your editing program and turn it down a bit. At first glance, it may make your image appear more unsaturated than preferred, but it can help you prioritize the colors that may need more saturation than others.
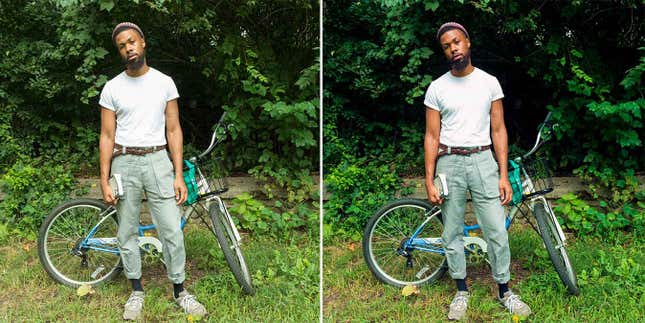
Skin tones typically fall within a spectrum of oranges and reds, notes Tshinanga. While reviewing and editing your photos, look closely at your subject’s skin tone. Is there a tint or color cast that may not be accurate, leaving a hue that is perhaps too yellow or too green?
For my own self-portrait above (that’s me in front of the bike), I adjusted the white balance in Adobe Camera RAW to bring more yellow and magenta into the picture. Then I applied Color Balance, Hue/Saturation, Vibrance, Levels and Curves layers in Adobe Photoshop to emphasize the warm reds in my skin tone.
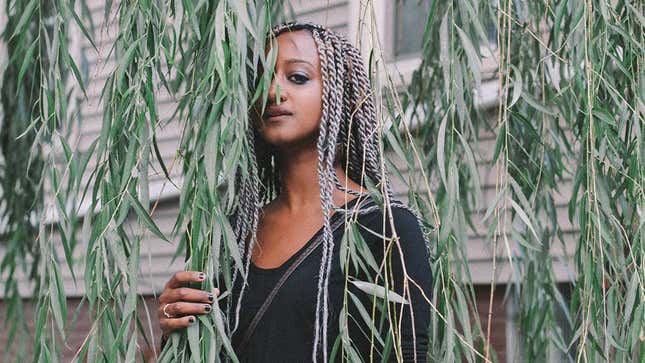
Some apps allow you to adjust colors individually. Larrow’s favorite feature in the Lightroom App is called Color Mix. Color Mix allows you to change three things: The hue, the saturation and the luminance, he notes. Think of hue as the tone of a particular color (“Green can get more bluish green to yellowish green,” Larrow notes), while saturation is the deepness of that color, and luminance impacts the brightness or darkness of that color. For the photo below, he used Color Mix to reduce the saturation of greens in the image and increase more blue in their hue.
Focusing your eye on your subject’s skin tone while adjusting the colors of your overall image within a tool like Color Mix can help ensure accuracy in representation. Similar tools worth exploring include Saturation and Color in Instagram; Skin Tone in VSCO; and Shadows, Contrast, Saturation, and Tint in the iOS Photos app.
Willing to step up to even more sophisticated tools? Photo-editing pros use hardware such as Wacom tablets. With an accompanying stylus, Wacom tablets allow you to draw in edits on a specific part of your photograph. For instance, if you photographed your subject beside a window, it could help to brighten up shadows on the side of your subject’s face that is not directly facing the window. This tool is most often coupled with editing techniques like masking in Photoshop, which allows for greater specificity when editing details without affecting other portions of the photograph (increasing the saturation of red in someone’s skin tone among a field of roses, for instance, without impacting the roses).
Though familiarizing yourself with these kinds of tools and techniques offers increased options for a photographer to experiment with, don’t feel overwhelmed by them. Listening intently to your subject, photographing thoughtfully, and making color adjustments using tools you may already have on hand can go a long way in simplifying the editing process: “The goal, hopefully” notes Tshinanga, “is that you can minimize how much you need to edit...when you take your photos so you don’t have to edit as much [later].”
Uncover a Diversity of Influences
The roads I continue traveling through photography have helped reshape how I see the world and my place in it. With my camera, I’ve found beauty nestled in the hidden and overlooked, and in plain view among what may be otherwise considered banal. Intentionally expanding my sphere of influence is a fulfilling practice, too. To capture diversity, studying the work of diverse photographers past and present is essential. It helps challenge the ways history has restricted marginalized voices. As Tshinanga notes, “I need more of just how roundabout we are and just how much of life that we live outside of this limited vision that the textbooks and society tries to put on us.”
In addition to the work of Larrow, Tshinanga, and Kamara, dive into some of their inspirations, too, which include Spear, Joshua Kissi, Malick Sidibé, Samuel Fosso and Black Archives. Explore the nuances of experiences that color our world, hue by hue. You may be surprised by what you’ve been missing all along.

Snapping on the Go? Remember These Quick Portrait Tips
- If in harsh sunlight that’s casting dark shadows, find shade like a tree or awning for more even lighting.
- Make sure any light source like a window or lamp is in front or beside and level with your subject.
- Pay attention to the background. Some backgrounds like a field of flowers can complement, while others like another person’s arm unintentionally in the frame can take away from your photo’s intent. Is there anything that could distract from your subject and the story you’re co-creating with them? If so, see if your subject can block it or if you can turn to remove it from what you’re capturing. Some portrait modes on newer smartphone models may also offer a convenient way to blur the background in your frame and make your subject stand out in a portrait.
- If photographing with the Camera app in iOS, tap on the screen to focus on your subject’s face, then slide your finger up or down to adjust the exposure (the overall brightness or darkness) of your image. If you want to try different poses and angles while keeping the same exposure level, newer models of iOS allow tap and hold to engage a feature called AF/AE Lock. Some Android devices have similar controls to manually adjust exposure settings. For instance, in the Samsung Galaxy S10, you can tap on the subject in the Camera app and then adjust the exposure using a sliding bar that pops up.
- Pay particular attention to exposure when photographing a group with varied skin tones. Try to ensure individuals with darker skin tones are not underexposed. If by a window or lamp, consider placing individuals with darker skin nearest the light source.
- Hold your phone or camera with both hands to minimize camera shake.
- Shoot first, edit later. Avoid in-camera filters that may alter your subject’s skin tone. You can add them later, if needed.
David Leon Morgan is social media program manager for Consumer Reports by day; photographer, crocheter and jigsaw puzzle lover by night. Follow him on Instagram.
Consumer Reports has no financial relationship with any advertiser on this site.

